
How to Paint Your Home Exterior
How to Paint Your Home Exterior (DIY Tips + Step-by-Step Prep)
We highly recommend hiring a professional painting contractor for exterior projects—there are a lot of variables (weather, surface condition, height, safety). But if you’re committed to DIY, this guide will help you plan, prep, and paint with fewer surprises and better results.
Exterior paint isn’t just for looks—it helps protect your home from sun, moisture, and wear. Follow these steps to set yourself up for a clean, durable finish.
Need help choosing paint, primer, tools, or how much to buy?
Email: [email protected] | Main: 770-702-8888
Step 1: Plan Around Weather (This Matters More Than You Think)
In a perfect world every painting day would be mild and dry—but real life happens. Use these weather rules to avoid costly mistakes:
Plan around rain. Even light rain can ruin fresh paint and undo hours of work.
Avoid painting below 40°F (and always check your product label for the exact temperature range).
Humidity slows drying. High humidity + low temps is a rough combo—paint stays wet longer and can lead to issues.
Avoid direct blazing sun when possible. Painting in strong sun can make paint dry too fast and cause lap marks.
Tip: Always follow the application and drying guidance on the paint label—different products have different requirements.
Step 2: Choose the Right Paint System (Paint + Primer + Finish + Tools)
Before you start, get your full system ready so you’re not scrambling mid-project.
PAINT
For most exterior homes, high-quality acrylic/latex exterior paint works well on common surfaces like:
wood siding
fiber cement
brick (with proper prep)
stucco / EIFS (with proper prep)
What separates “good” exterior paint from “cheap” exterior paint is usually:
stronger UV resistance (less fading)
better flexibility (expansion/contraction)
improved resistance to wind-driven rain
better mildew resistance and dirt resistance
PRIMER
Exterior primers vary based on what you’re painting (wood vs masonry vs previously coated surfaces). If you’re unsure, we can point you to the right primer for your substrate and condition.
FINISH
For most exteriors:
Low-lustre / satin is a go-to (often resists dirt better than very flat finishes)
Many homeowners choose semi-gloss for trim/doors/shutters for a little pop and easier wipe-down
TOOLS (Brush, Roll… or Spray?)
Most DIY exterior jobs will use both brush and roller.
Rollers speed things up on broader surfaces.
If you want to spray: sprayers can be effective but require experience and careful masking. Many DIYers prefer brush/roll for control.
Tip: Quality tools matter. A good brush/roller can make your finish smoother and save time.
Step 3: Prep (The “Clean. Dry. Dull.” Rule)
If you want your paint to last, prep is the job.
CLEAN
Remove dirt, chalking, mildew, and loose debris
If you power wash with anything beyond water, protect plants and landscaping (plastic + tape)
Cover anything you don’t want cleaner overspray to touch
Mask windows if needed so you’re not scraping paint flecks later
DRY
Your exterior must be fully dry before priming/painting. Wet surfaces = poor adhesion.
If you’re painting wood, moisture content matters—if you suspect moisture issues, ask us and we can guide you.
DULL
Paint doesn’t love shiny surfaces. If something is glossy (often doors/trim):
scuff sand or use a deglosser so primer/paint can grip
If you have peeling paint, don’t paint over it.
scrape/sand loose areas
feather/smooth edges
fix the cause (water intrusion, failing caulk, etc.)
Step 4: Prime (Spot Prime vs Full Prime)
Primer builds the foundation for adhesion and uniform color.
Spot prime where you sanded to bare substrate or repaired damage
Prime fully where needed (many masonry/brick situations benefit from full priming)
Tip: Priming before caulking/patching often helps you see what truly needs attention and supports better adhesion.
Step 5: Caulk + Patch
Caulking seals gaps where water can enter and improves the finished look.
Caulk around windows/doors and small gaps
Use a high-quality paintable exterior caulk
Smooth it out for a cleaner finished result
Caulk between siding joints and around flashing where appropriate
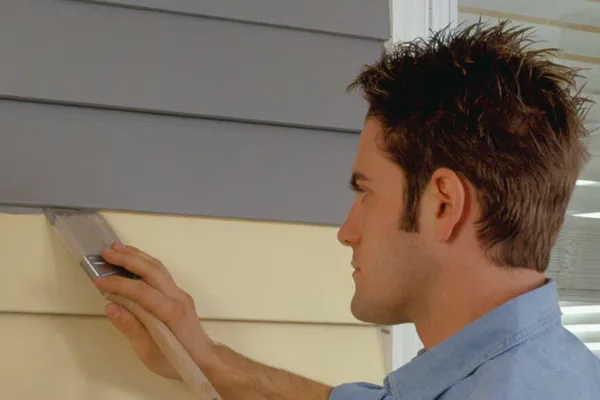
Step 6: Paint (Top-Down + Shade Side First)
Painting workflow matters—especially outdoors.
Start on the side of the house that stays shaded longer
Work top to bottom
If you’re painting trim and siding: many pros do trim first, then the main field color
Plan on two coats for best durability and color development
Tip: Paint formulas typically work for brush/roll (and often spray). Your technique and conditions are what change the result.
Painting Tips by Surface
Wood Siding
Cut in around trim and detailed areas first
Roll in manageable sections (about 3–4 feet)
Feather edges with your brush if needed for a smoother blend
Watch for drips under laps/moldings and catch them early
Brick
Acrylic/latex paint is often a strong choice for brick—but prep is key.
Don’t paint over efflorescence (white, chalky salt deposits). Remove it first (wire brush/scrub + address moisture source).
Make sure brick is clean and dry before priming/painting.
Exterior Painting Supply Checklist
Exterior paint + exterior primer (matched to your surface)
Scraper + sanding sponges/sandpaper
Cleaner/degreaser (as needed) + scrub brush
Drop cloths + plastic sheeting
Painter’s tape
Caulk + caulk gun
Exterior patch/filler (as needed)
Quality exterior brush(es) + roller frame + roller covers
Extension pole
Ladder (and safe ladder setup)
Gloves + eye protection (and a mask/respirator if sanding old coatings)
Safety note: If your home was built before 1978, coatings may contain lead. Use proper precautions and consider professional guidance for sanding/scraping.
Need Help Choosing Exterior Paint, Primer, or Tools?
At in.SIDE.out Paint Centers, we’ll help you pick the right system for your surface and your weather window—and make sure you have the right tools for the job.
Email: [email protected]
Main: 770-702-8888
Order & Store Info
Contact / Order Help
Email: [email protected]
Main: 770-702-8888
Roswell Alpharetta Paint Center
Address: 10731 Alpharetta Hwy, Roswell, GA 30075
Direct: 770-613-3330
Main: 770-702-8888
Email: [email protected]
Store Hours:
Monday–Friday: 7:30 AM – 5:30 PM
Saturday–Sunday: 9:00 AM – 2:00 PM
East Cobb Merchant Walk Paint Center
Address: 4235 Merchants Walk Dr Ste 100, Marietta, GA 30068
Direct: 470-308-4620
Main: 770-702-8888
Email: [email protected]
Store Hours:
Monday–Friday: 7:30 AM – 5:30 PM
Saturday–Sunday: 9:00 AM – 2:00 PM
Parkaire Landing Paint Center
Address: 4880 Lower Roswell Rd Ste 135, Marietta, GA 30068
Direct: 678-741-8035
Main: 770-702-8888
Email: [email protected]
Store Hours:
Monday–Friday: 7:30 AM – 5:30 PM
Saturday–Sunday: 9:00 AM – 2:00 PM
